Creating a bot account
Creating a bot account
To get started with nyxx, you'll need a Discord bot account!
- Head to the Discord developers site. You'll be prompted to login if you aren't already.
- Once you are signed in, you should be redirected to the applications page.
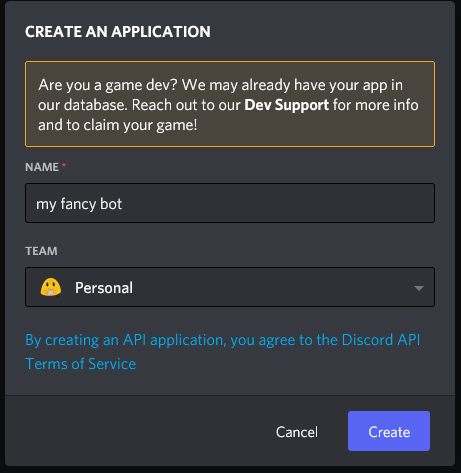
- Look towards to the top right and click the New Application button.

- Type in a name for the application, this will be the initial name of your bot account. Then click Done.
- On the left menu, select the Bot tab, then look to the right and click the Add Bot button.
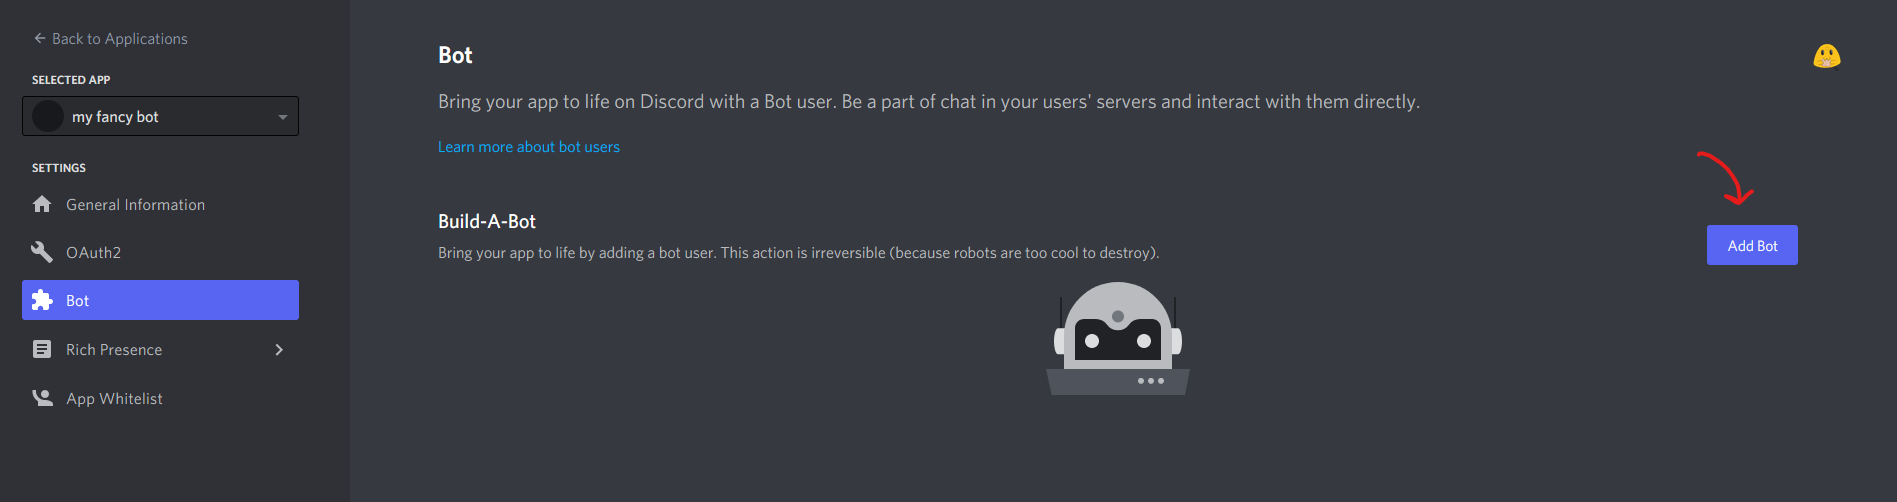
- You will be presented with a menu asking if you really want to add a bot, which we do so click Yes, do it!
Getting your bot's token
danger
Do NOT share or publish this token anywhere publically. If you do, anyone will be able to use your bot account to perform any bot actions - such as banning users and leaving guilds.
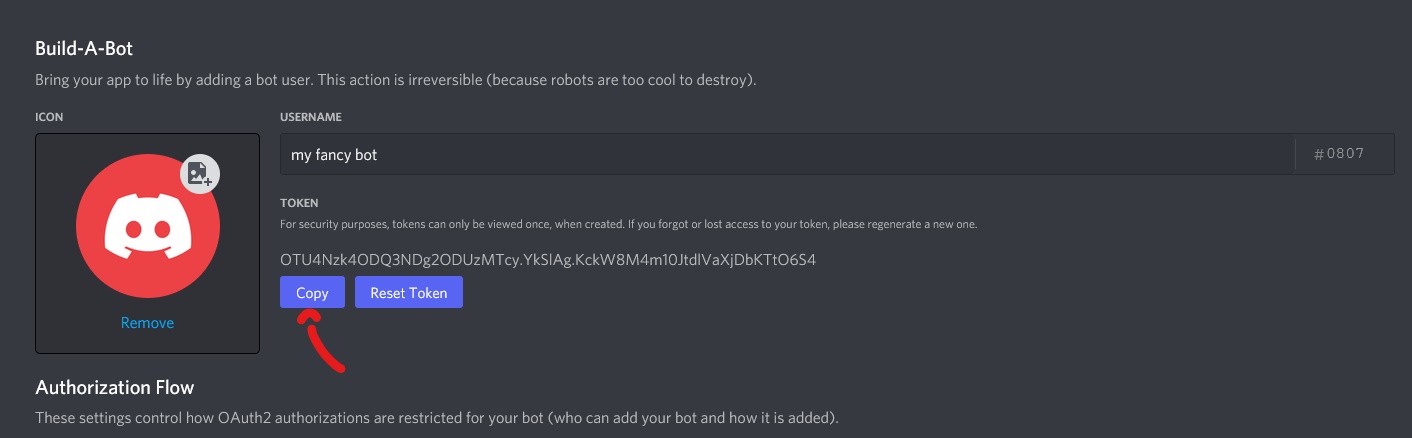
Once your bot account is made, on that same Bot tab, there will be a section labeled Token.
To get your bot token, click on the Reset button. Discord will generate a new token so we can use it to run our bot.
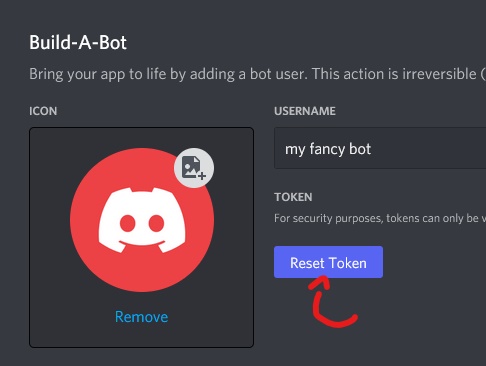
Next, click on Yes, do it! button to generate a new token.

If you enabled the two factor authentication, you should encounter this window. Enter your auth codes (there are in an authenticator app (depends on which you chose)), the backup codes given from Discord will not work.
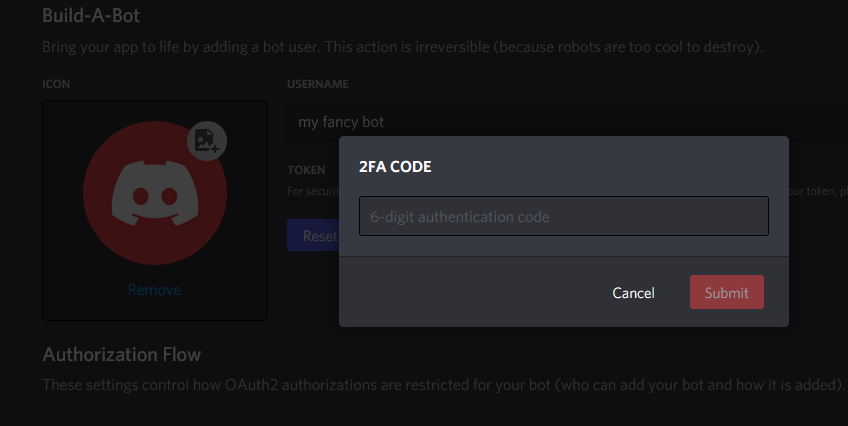
Now you can finally copy your bot token.
tip
In the event you share your token, be sure to press the Reset button so the old token can't be used anymore.
Inviting your bot to a server
Now that we've gotten this far, it's probably important that we invite the bot to your server to actually test commands in!
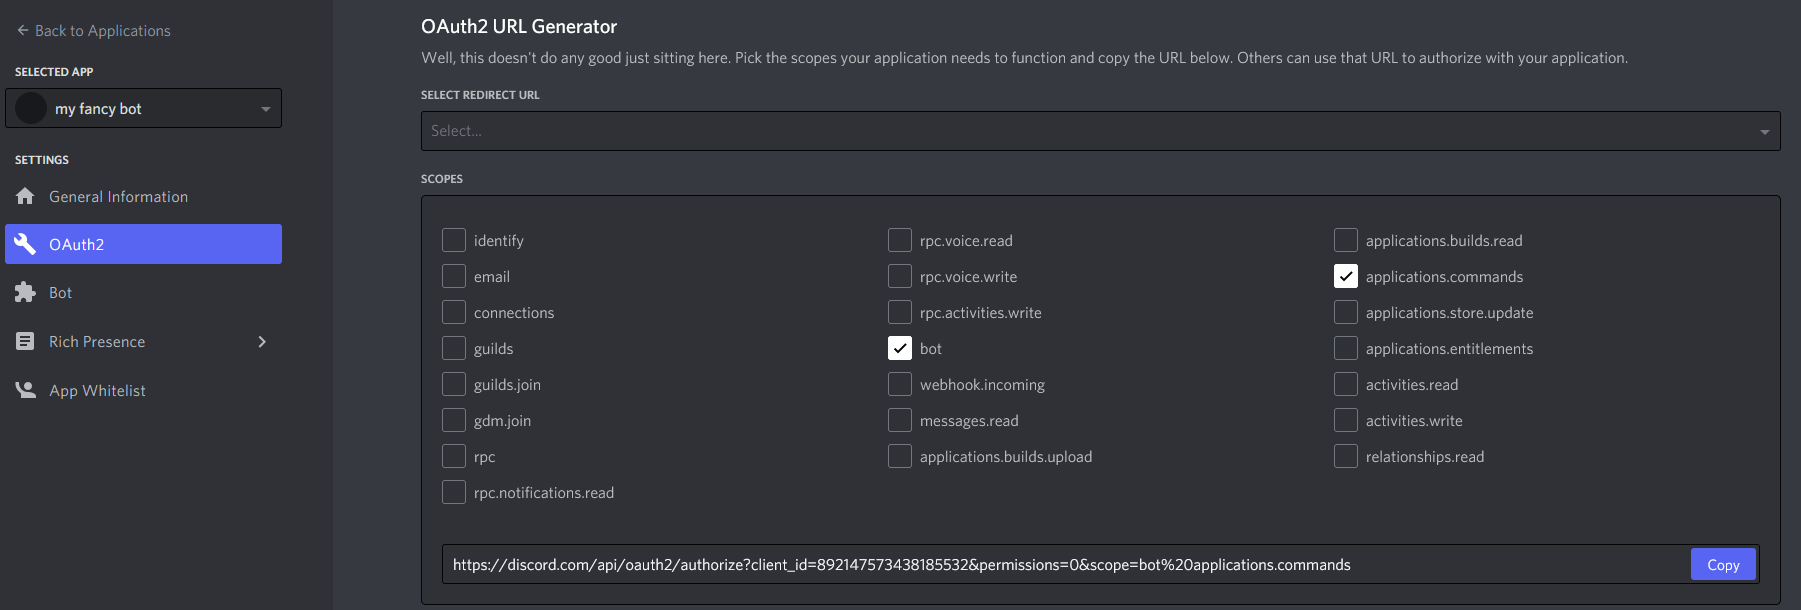
- First, head to the OAuth2 tab found in the left menu on your bot's application page.
- Then scroll down to the OAuth2 URL Generator and select the bot checkbox under the scopes section. If you wish to use slash commands as well, check the application.commands scope.
- Scroll down some more so you can see the Bot Permissions section. This is where you get to select which permissions your bot has when it joins a server. For basic usage, select the View Channels and Send Messages permissions, and then scroll up to the generated URL and click the Copy button on the right.
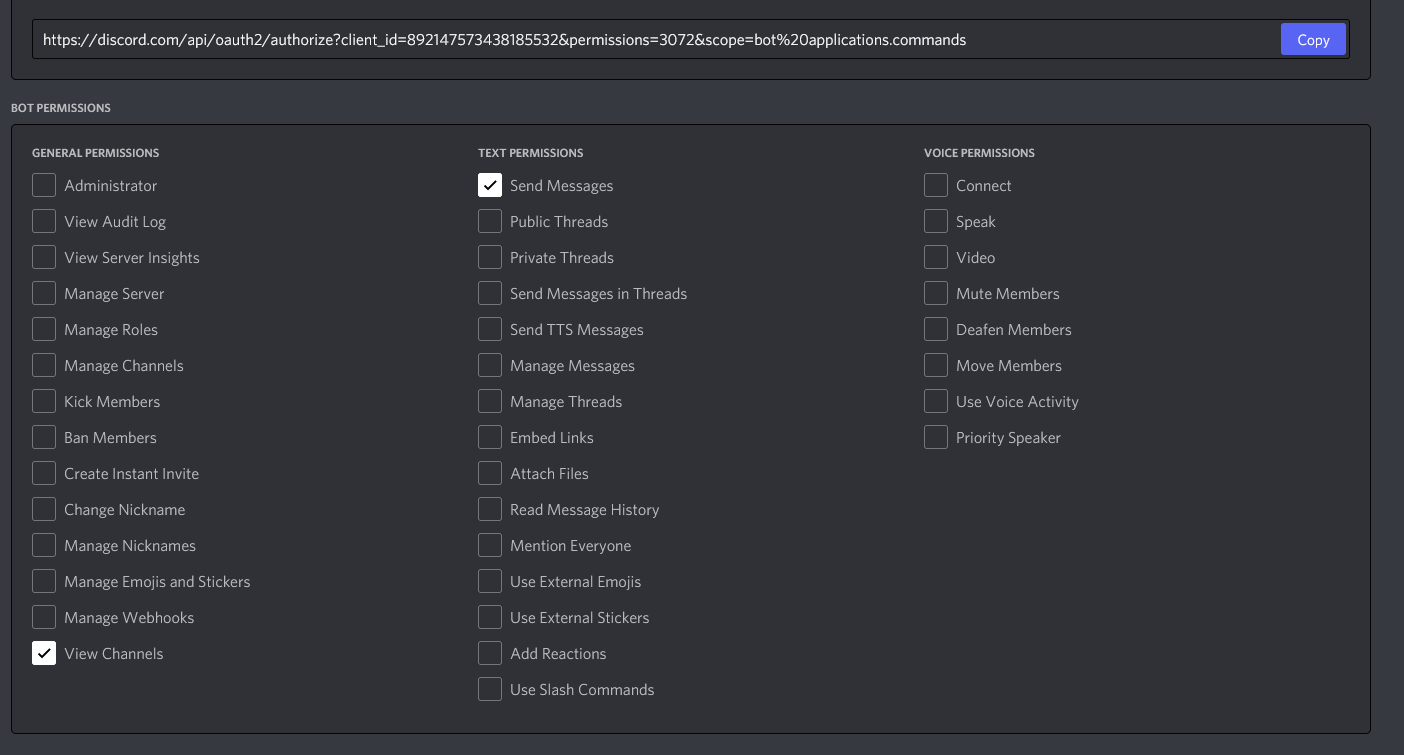
- Finally, head to that URL in your browser and add your bot!
Making your bot public (or private)
- Head to the Bot tab found in the left menu on your bot's application page.
- Under the Authorization Flow section, find the Public Bot toggle.
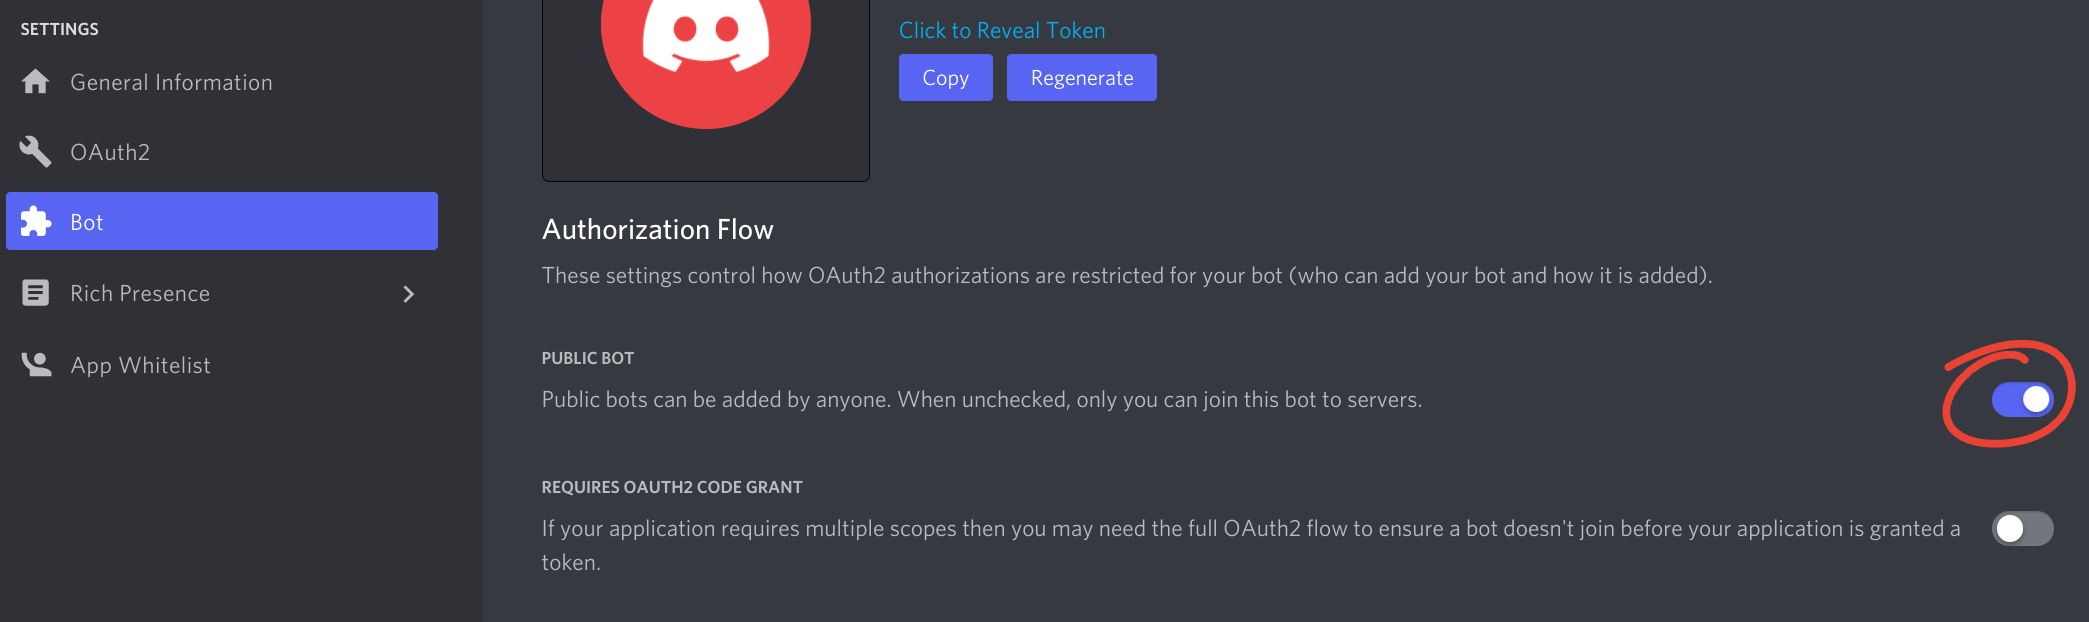
- To make your bot public so anyone can add it to their server, change the toggle to the right (so it's blurple); and do the inverse to make it private so only you can add the bot to servers. By default your bot should be public.
Privileged Gateway Intents
Gateway intents make it so your bot can only recieve specific intents to lower the processing power necessary for the bot. Some of these intents are limited since they can contain potentially more sensitive data.
These include:
- Presence Intent: This toggle will enable you to recieve events when someone's presence or info is updated. This includes their status, username changes, avatar changes, as well as other similar info.
- Server Members Intent: This toggle will enable you to recieve events when guild members join and leave the server, when members are updated, who was added to and removed from a thread, and the ability to list guild members.
To toggle these intents:
- Head to the Bot tab found in the left menu on your bot's application page.
- Find the Privileged Gateway Intents section.
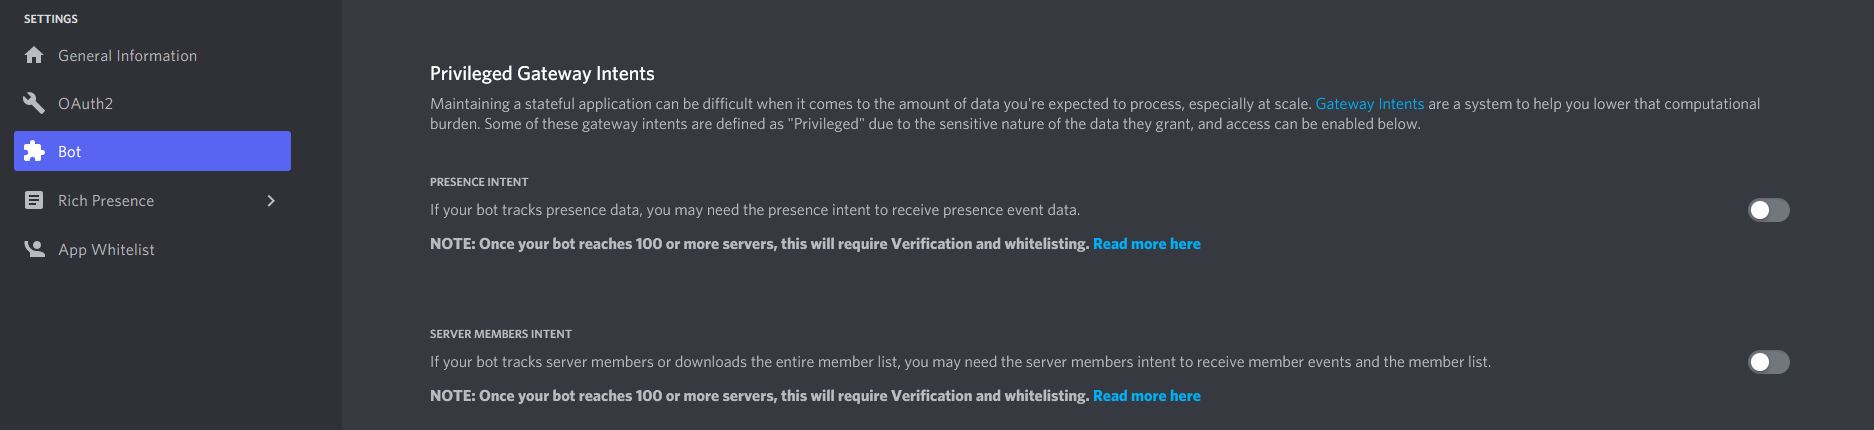
- Toggle the intents as necessary for your bot.